UPDATE September 19, 2015: Want to learn how to carve pumpkins like these? I’m creating a set of step-by-step video tutorials. Check out Carve Awesome Pumpkins for more info!
~~~

I carve pumpkins with a baby on my back!
I love Halloween. One of my favorite parts is carving pumpkins. This is the first of several pumpkin carving posts. Today, I’ll talk about the tools that make carving easier along with some tips I’ve learned along the way.
The next few weeks I’ll share pumpkins I’ve carved or other have carved that feature YA books or movies and also how to get the patterns so you can carve them too.
Finally, on October 28, I’ll share photos of the pumpkins I carve this year. And maybe my entire collection.
You might be thinking, “But it’s only September. Isn’t that way too early to think about pumpkin carving?”
It’s never too early to think about carving pumpkins! 😀
Since discovering carvable, foam pumpkins, I start carving in September. Sometimes earlier. Many carvers stock up on the foam pumpkins during the Halloween season so they can carve all year long.
When I carve real pumpkins, I usually do that the day of or the day before Halloween. But I still take the time to think about the patterns I’ll carve since I need to know what size pumpkin to buy.
Get a Pumpkin Carving Pattern

Pumpkin Masters pattern books available in craft stores
The first thing you need to do, if you want to create a fantastic-looking pumpkin, is print a pattern to follow. You can find some patterns in booklets at craft stores.
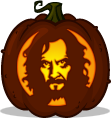
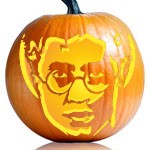
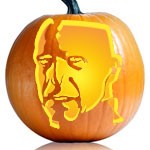
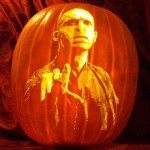
There are two types of patterns: cut-outs and shaded. In a cut-out pattern, all parts of the pattern are completely removed from the pumpkin. In general, cut-out patterns are easier than shaded patterns, but they do not have as much detail. In a shaded pattern, there are pieces that are completely removed from the pumpkin and also pieces that are just shaved. It will take more time and patience to do a shaded pattern, but your efforts will be rewarded. Shaded patterns look more dimensional and detailed in the finished product.
If you are artistically inclined, you can create your own patterns, but anything beyond a simple picture will require practice. There are also tutorials online for using photo editing software to manipulate images into patterns. One such tutorial is found at www.pumpkinwizard.com
Creating great-looking carving patterns is an art. The fastest and easiest way to get a pattern is to download it from the internet. There are many sites to choose from, and most them work the same way: certain patterns that are free to download and the rest you need to pay for by either purchasing them separately or purchasing a membership to the website.
Some of the most popular websites include:
Choose Your Pumpkin
You’ll have to decide if you want to carve real pumpkins or foam pumpkins. There’s nothing quite like carving a real pumpkin, but there’s something to be said about not having to watch all your hard work shrivel up and get moldy in just a few days.
You can purchase foam pumpkins in just about any big-box craft store. Even Target now carries carveable pumpkins. There are pros and cons to both real and foam pumpkins, and which brand of foam pumpkin you use. A Google search will help you decide which is right for you.
When I carve foam, I use the ones sold at Michaels. I’ve never tried the Funkins brand or the brand Target sells.
Gather Your Tools — Real Pumpkins
Now that you’ve got your pattern, you need the right tools. The tools you’ll need will depend on not only the type of pattern you’ve chosen but also the type of pumpkin you’re using.

For shaded patterns on real pumpkins, you’ll need a set of wood carving tools.
For real pumpkins, you’ll want a good set of pumpkin saws like the ones shown above by Pumpkin Masters (available at craft stores).
For shaving on real pumpkins, you’ll want a set of wood carving tools or a Speedball. Both are available at craft stores.
Gather Your Tools — Foam Pumpkins

A hot knife can be used on a foam pumpkin for cut outs.
For simple cut-out patterns, you can use a hot knife (left) to carve foam pumpkins. Hot knives are easy to use so they require less practice before you can get started. They’re also inexpensive, and you can buy one with a 40% or 50% off coupon that are always available from craft stores.

A dremel tool takes more practice, but it’s also used for shaded patterns.
Alternatively, you can use a Dremel(right). There are a variety of models, from battery-powered to plug-in, ranging in price from $25 to over $100. In my experience, the battery-powered models are not useful for carving pumpkins.
For cutting, you’ll want a small drill bit, such as a 3/64 inch bit.
If your pattern has shading, your best tool for the job will be the Dremel and a variety bits:
- #7134 5/64″ Diamond Wheel Point Bit
- #106 and #107 Engraving Bit
- Diamond Burr Bits in a variety of sizes
- Stone Sanding Bits in a variety of sizes
General Carving Tips
Now that you’ve got your pattern, your pumpkin, and your tools, here’s some tips to help make your carving a success.
- Practice, practice, practice!If you’re able to, buy at least one extra pumpkin that you can practice with.

Buy an extra pumpkin to practice on.
- Size matters! Make sure your pattern will fit on your pumpkin. You can re-print the pattern in the size you need, but remember that the smaller you make the pattern, the more difficult it will be to carve.
- Think before cutting! Work your pattern from the middle out to the sides. Try to leave the largest cut-outs for last. It will give your pumpkin more stability as you work.
- Break it up! Large pieces do not need to be cut out in one chunk.
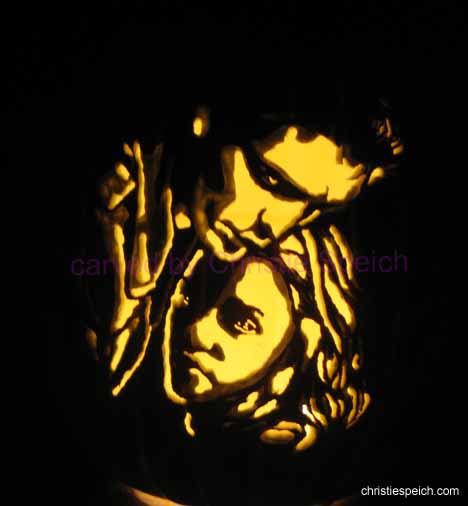
- Don’t judge how your pumpkin will look until you’ve put a light inside and look at it in a dark room. You’ll be surprised!
- When shaving, do a little bit at a time. You can always shave deep afterwards, but you can’t un-shave if you’ve gone too far! If the sections aren’t as bright as you’d like, shave a little deeper.
- Shade first or cut first? It’s a personal preference. Try it both ways on your practice pumpkin and see what you like.
- Print two copies of your pattern so you have one to refer to while you tear up the one on the pumpkin as you carve.
Carving Tips — Using Real Pumpkins
Carving Tips — Using Foam Pumpkins
- Use washable glue to adhere your pattern. Let it dry overnight. It’ll be easy to remove with a rinse when you’re done.
- NEVER use a candle in a foam pumpkin. Only use a battery-powered or plug-in light.

C9 Christmas Lights. Use clear bulbs.
- If you’ll have several pumpkins to light, consider using a strand of C9 Christmas bulbs. Use 1-3 bulbs per pumpkin, depending on the look you want.
- Carving fake pumpkins results in a LOT of dust. You’ll want to do this in a garage, basement, or outside, if possible. Or at the least, some room that is easy to clean.
- Safety goggles and a dust mask are a good idea. I can tell you from experience that pumpkin dust in the eye is NOT pleasant.
- A large apron – like you might find at a hairdresser’s – is another good idea. Or at least wear clothes that you won’t mind taking off and throwing in the wash afterwards.

Clip Light for individual pumpkins. Available at Dollar Tree stores or online.
- Cut a 4” hole in the bottom of the pumpkin, instead of a lid in the top like a real pumpkin. Or cut a small hole in the back if you plan to use a clip-in light.
- Choose the best size bit for the shape you are working with.
- Double-check your work by putting a light in the pumpkin and viewing it in a dark room.
- When you are happy with the depth of your shading, smooth it out with the sanding stones on a low speed.
- Don’t get discouraged! It takes practice but you’ll get the hang of it quickly. The difference between my first fake pumpkin and my third was astonishing!
I hope these tips are enough to get you started. The Stoneykins website has some really great tutorials with photos. That’s where I learned how to carve foam pumpkins.
Next week?
I’ll share some links to patterns inspired by young adult books.
Are you planning to carve any pumpkins this year? Have you carved foam
pumpkins before? Do you prefer the real ones?